
Inkscape Glow Tutorial
This tutorial demonstrates how to apply an inner and outer glow as well as a texture to a shape in Inkscape [extern]. In the tutorial this will be done for part of a map, but the effect is very useful for lots of other kinds of graphics as well. :)
(This is a translation of my german language tutorial here. I did not translate the screenshots, but it I hope it will be possible to follow the tutorial anyway. :))
In this tutorial, you will work with layers a lot. Therefore the layer settings should always be visible. You can open them with Shift+Ctrl+L. One important notice before we start: Objects cannot be manipulated unless the layer on which they reside is unlocked. The layer can be unlocked by clicking on the small lock symbol beside the layer name. I will always state on which layer you should work, but you will have to make sure it is unlocked! You can select all objects on all unlocked layers by pressing Ctrl+A. However, if some layers have been unlocked unintentionally, strange results may occur.
To see which objects are on a layer, you can make the other layers invisible by clicking the eye symbol beside the layer name. If you are not sure which of the objects are selected, just make all the other layers temporarily invisible.
So, let's go!
1) In Inkscape, create a filled square. This is is best done with the "Create rectangles and squares" tool while holding down Ctrl. Choose a saturated, dark blue as the fill color (the fill settings can be displayed with Shift+Ctrl+F). This square will be the background. There is no need for a stroke, so just disable it in the "Stroke paint" settings.
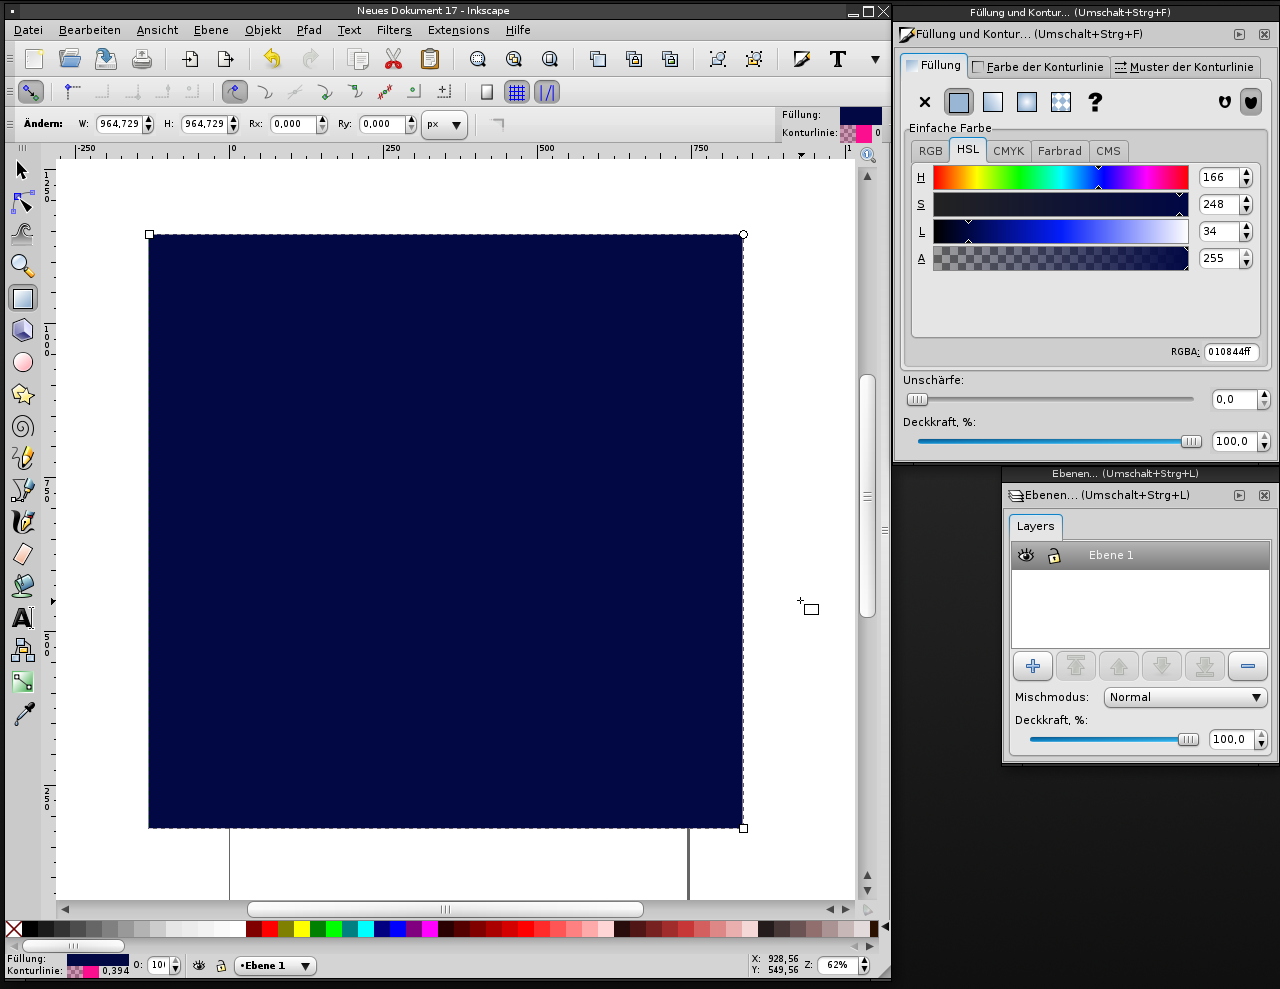
2) Set the document size to the size of the background. For this you need to select the square first, then open the File -> Document properties dialogue and select "Fit page to selection". You can close the dialogue after this.

3) Rename the layer to "Background" (click on the name) and lock it by clicking the lock.
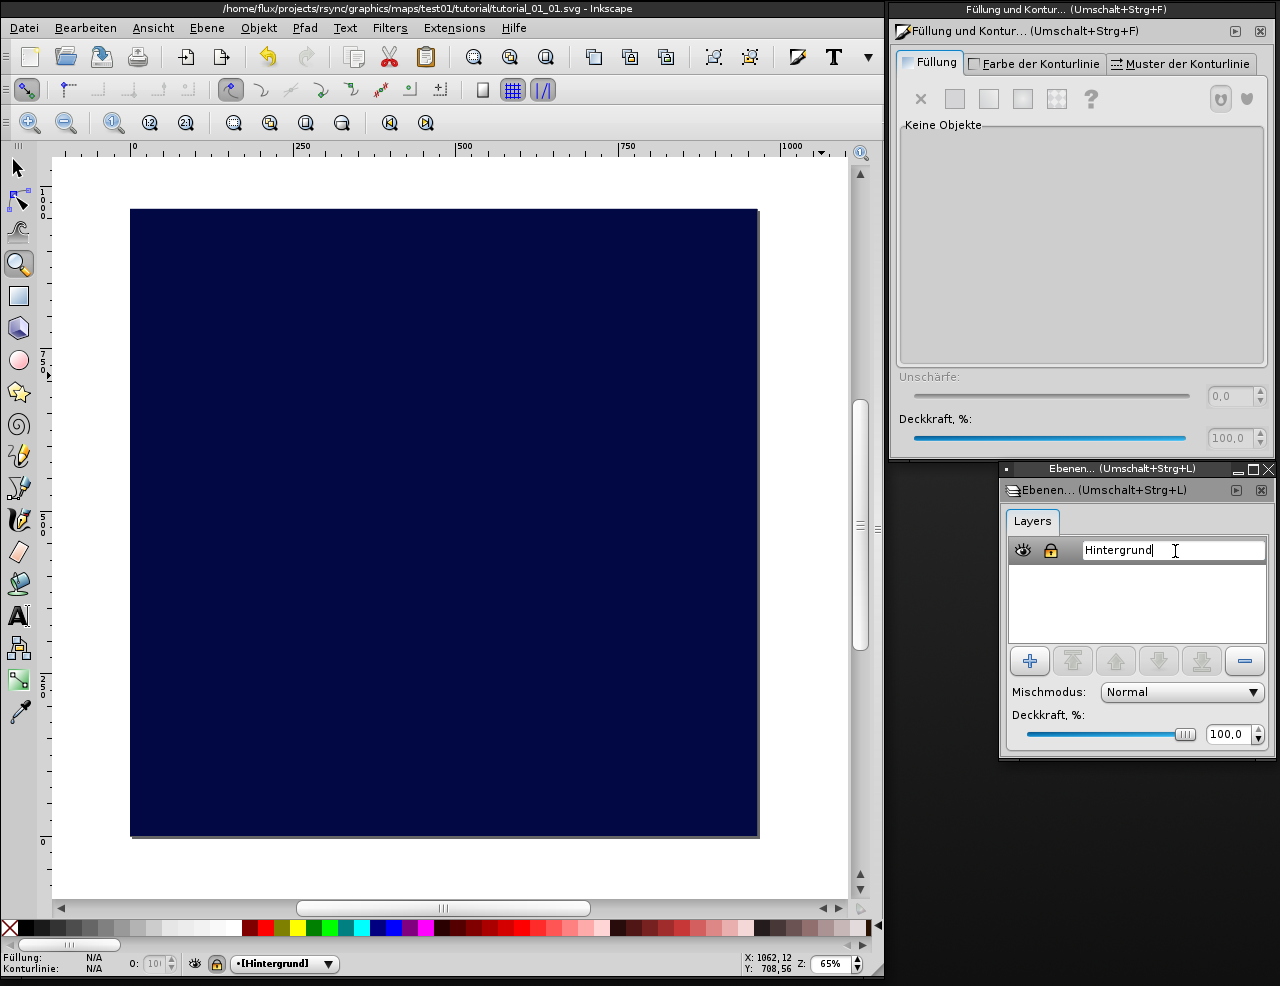
Add a new layer and name it "Shape 01".

4) Select the "Draw Bezier curves and straight lines" tool and draw a rough shape. Straight lines will suffice and the shape can be quite rough. Details will be added in the next step. Pick a saturated yellow-green as the color for this shape.
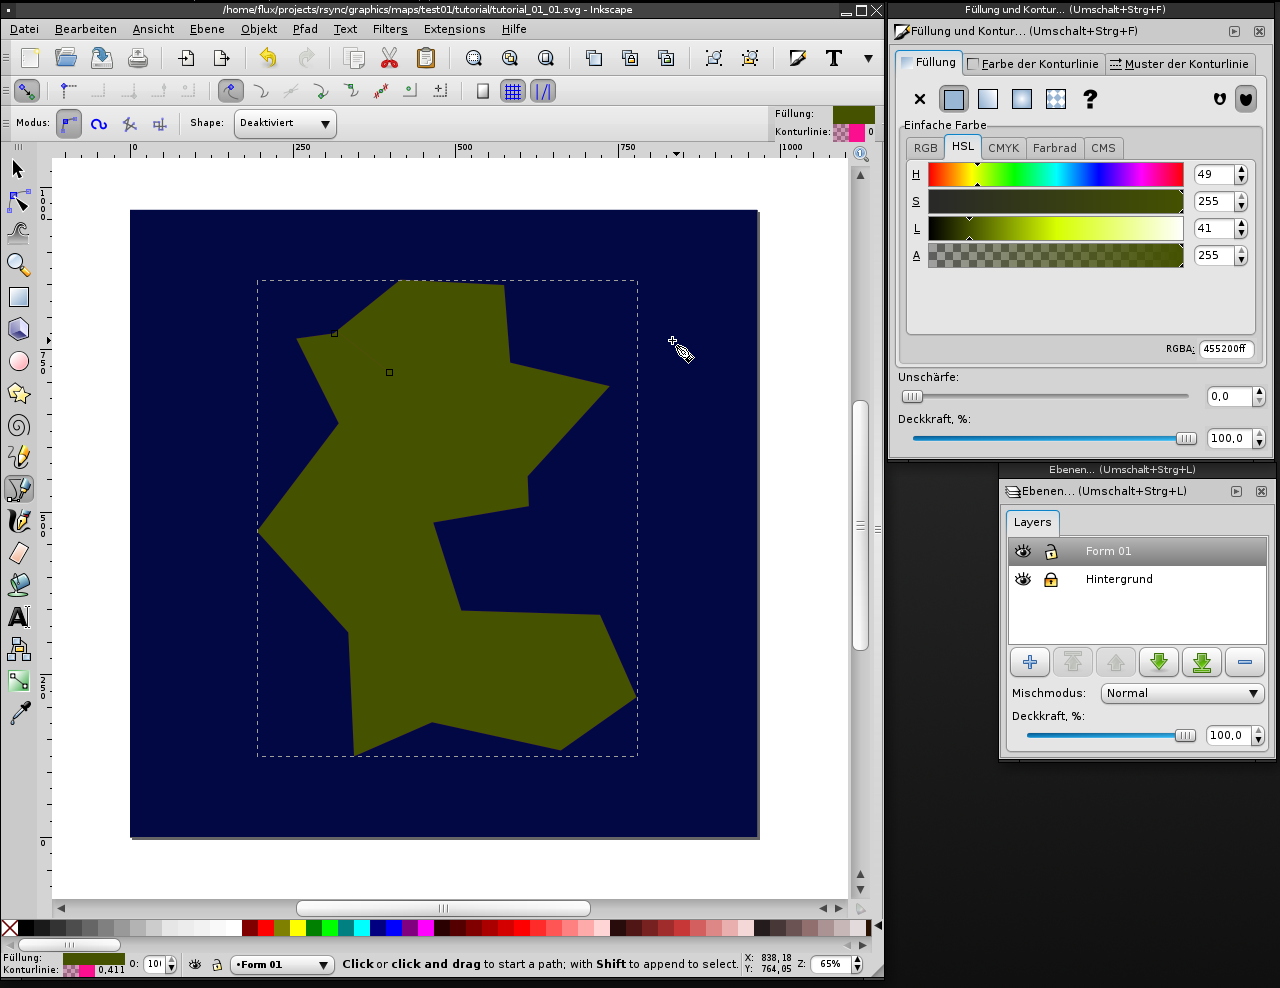
5) Select the form and then select the Effects -> Modify path -> Fractalize menu option (the menu may be called "Extensions"). I use 6 subdivisions and a smoothness of 2, but feel free to experiment. The shape now has the details we want. :)

6) Select the shape and copy it to the clipboard (Ctrl+C). Create a new layer named "Glow (outer)". Paste the shape at the original position on the new layer (Ctrl+Shift+V). Select a saturated but not too bright cyan blue as the fill color and set the blur to 5 (or whatever you like best ;)).
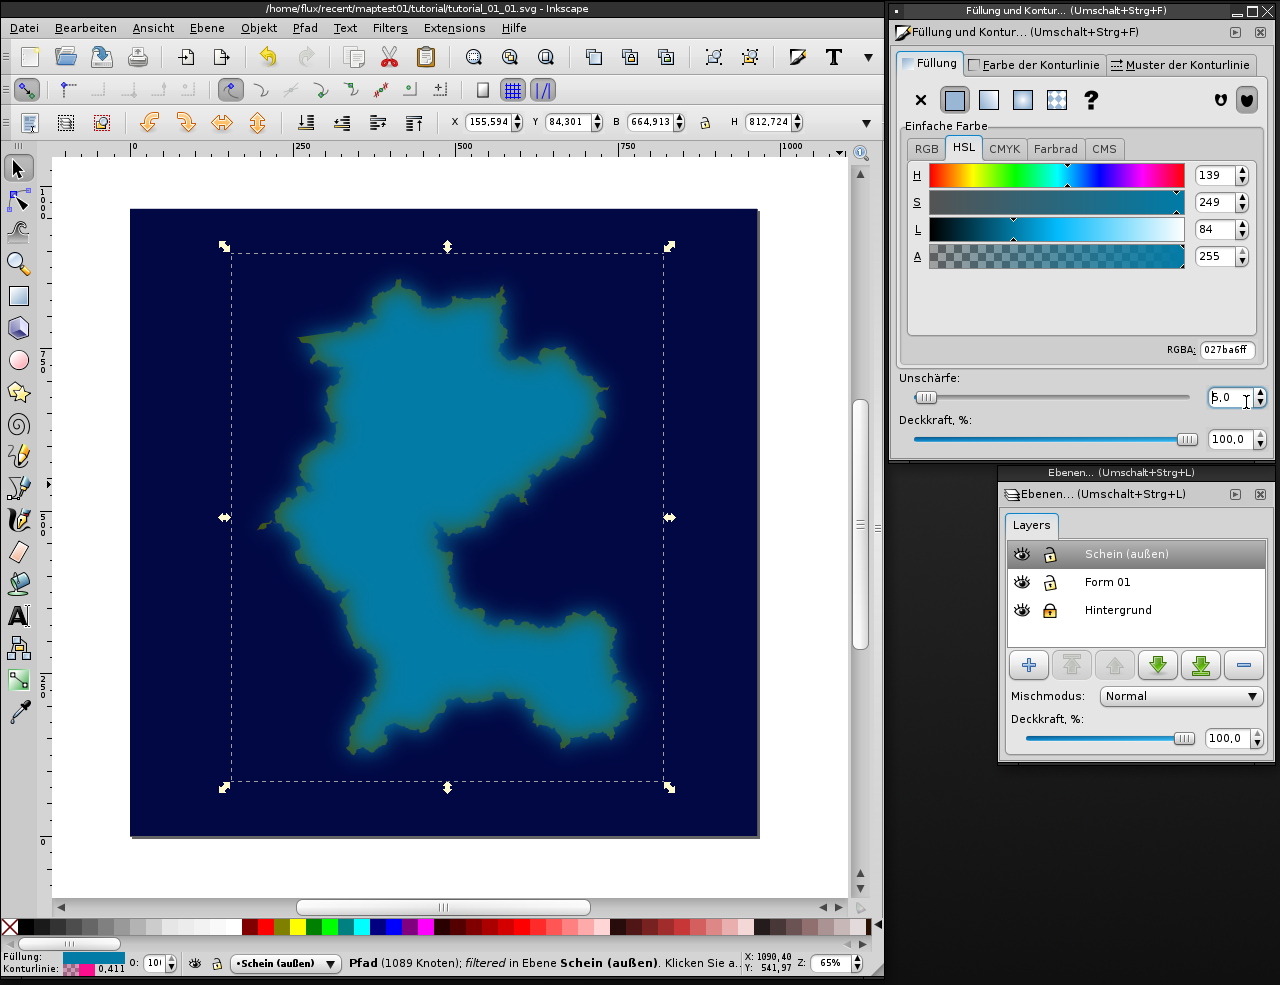
Click the green arrow pointing down to move the layer "Glow (outer)" below the layer "Shape 01". Lock the layer "Glow (outer)" by clicking the lock.
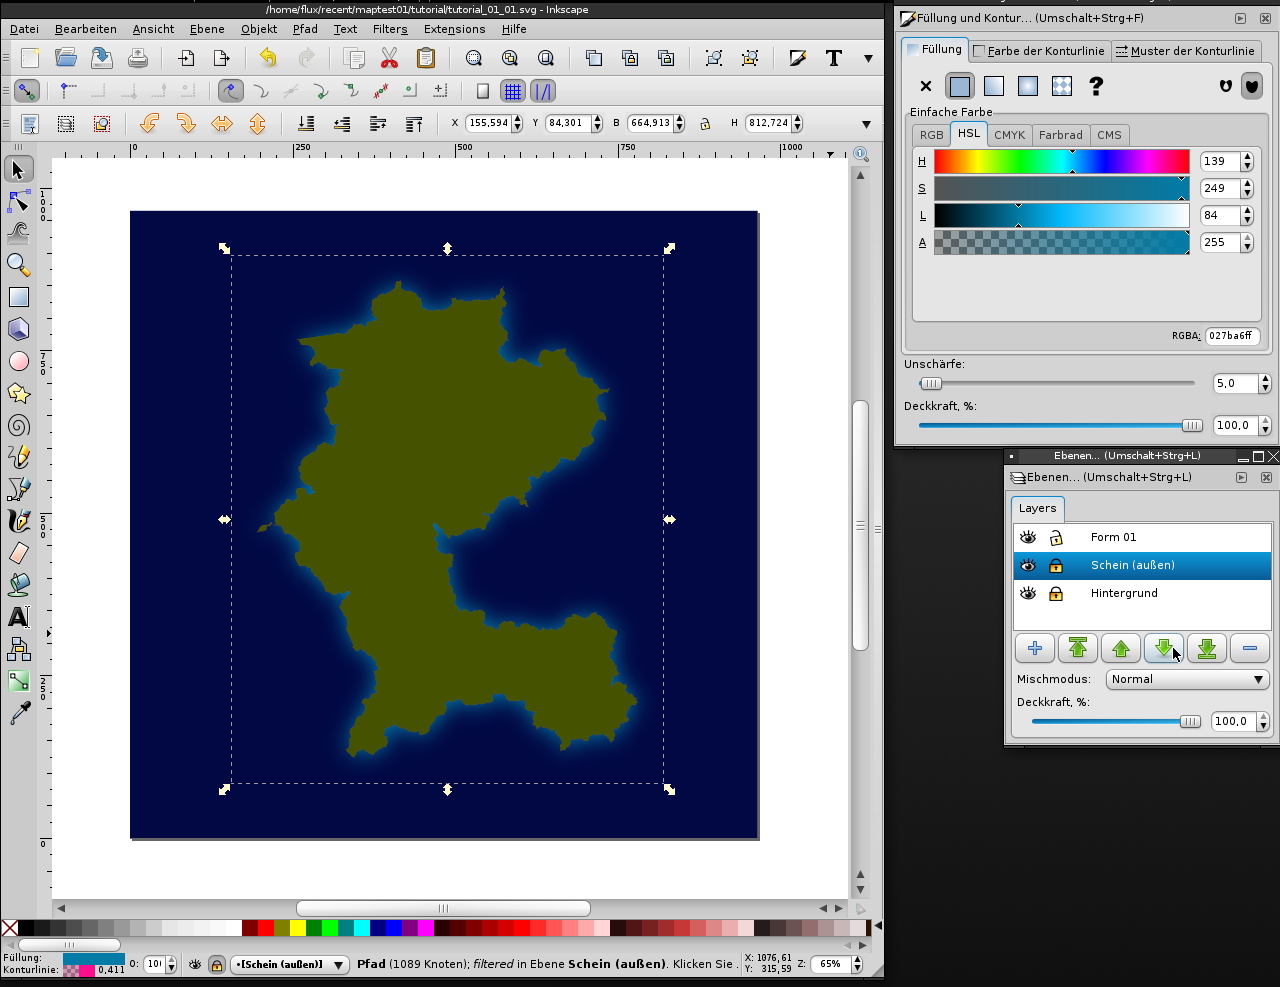
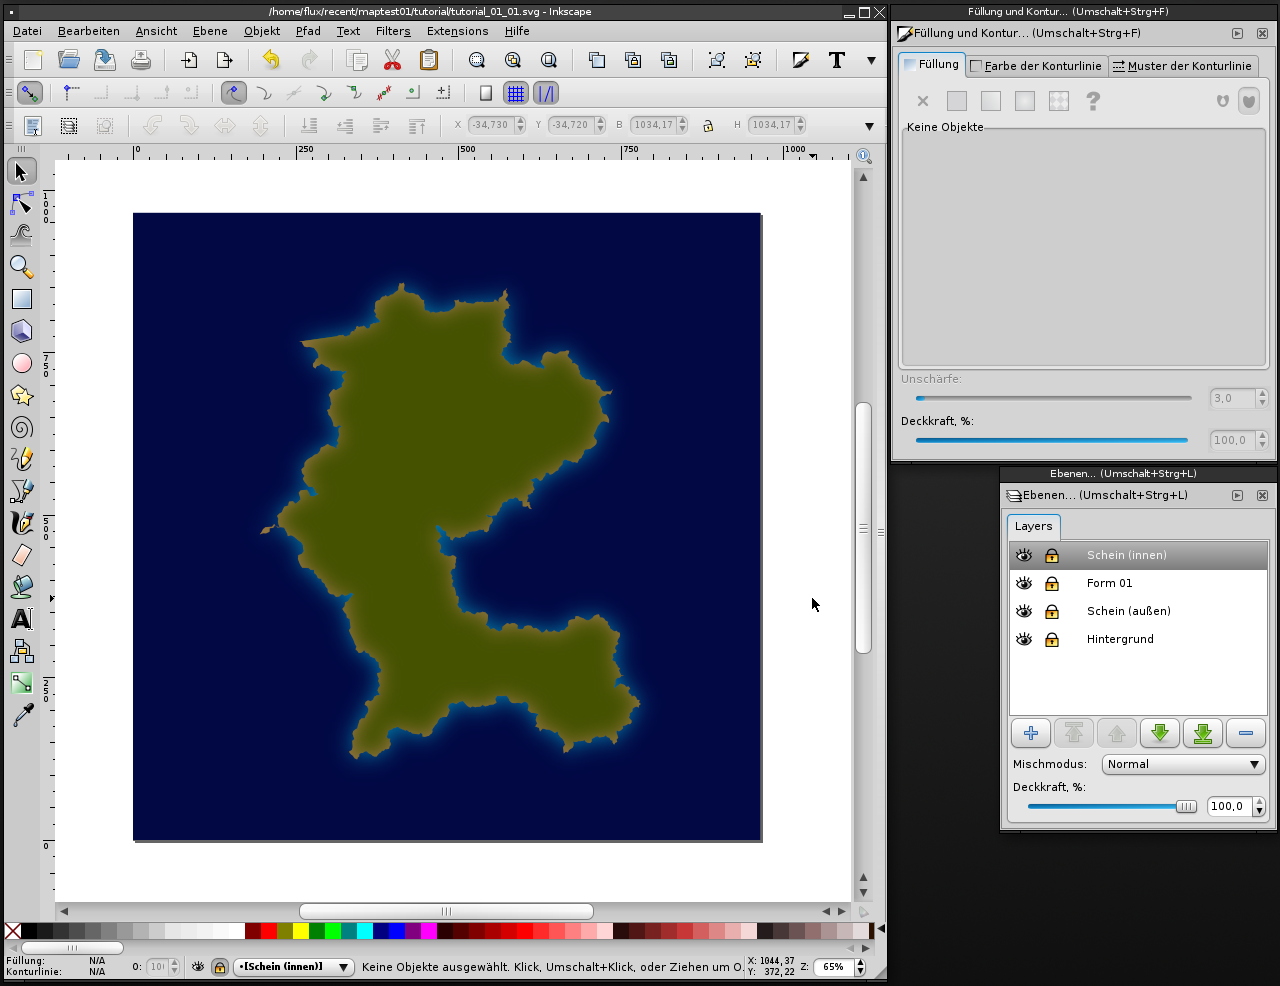
The outer glow is now finished!
7) Make sure the layers "Background" and "Shape 01" are unlocked. Select both the background and the shape (hold Shift) and copy them to the clipboard (Ctrl+C). Create a new layer and name it "Glow (inner)". Select the new layer and lock all other layers. Paste the objects at the original position (Ctrl+Alt+V). Move the layer to the top position by clicking the green upwards pointing arrow in the layer list.
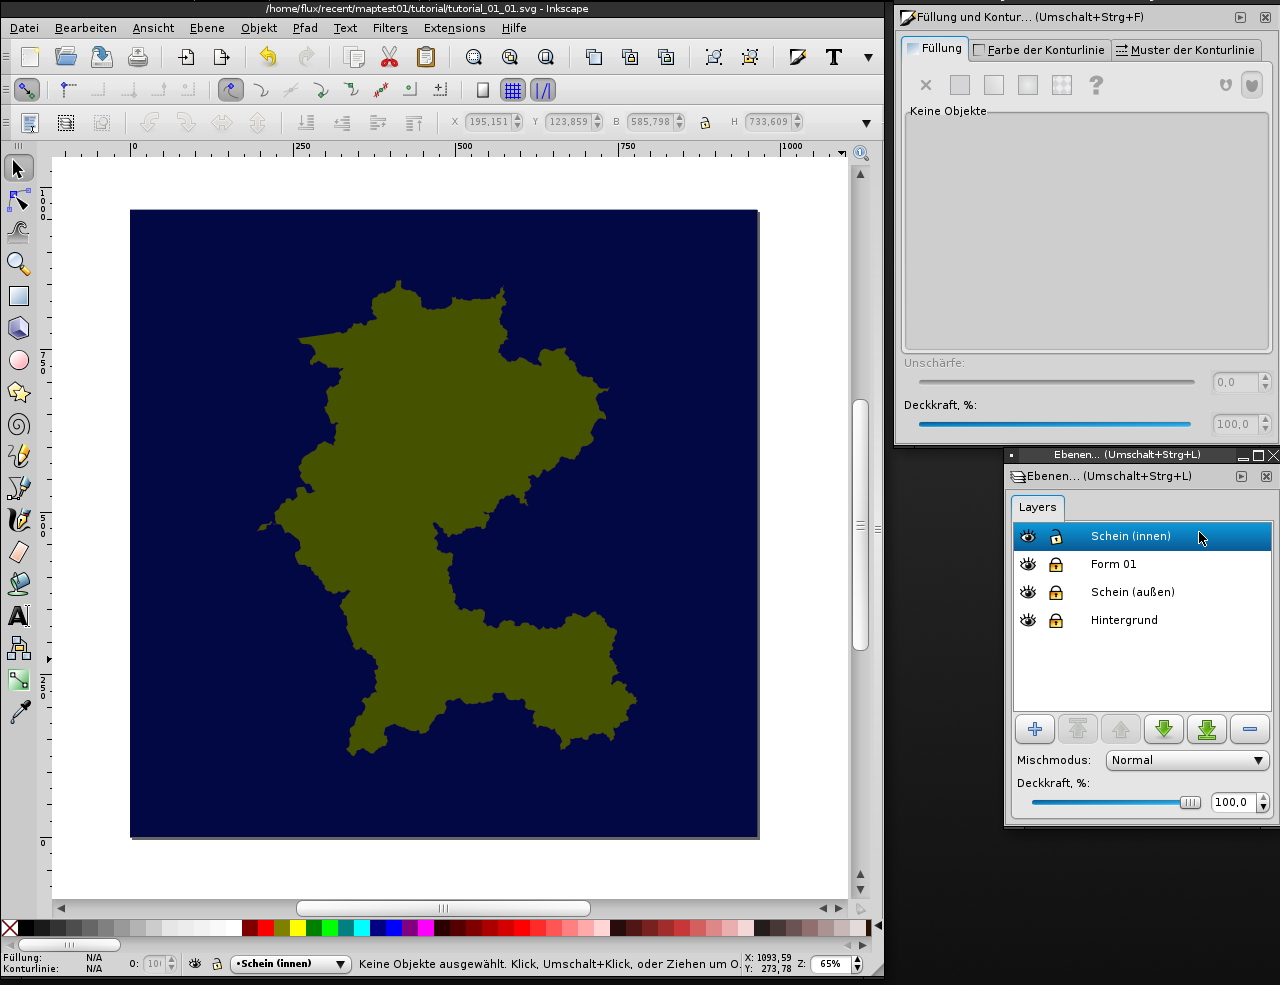
The image may not look very differently yet but this step is nonetheless very important. :)
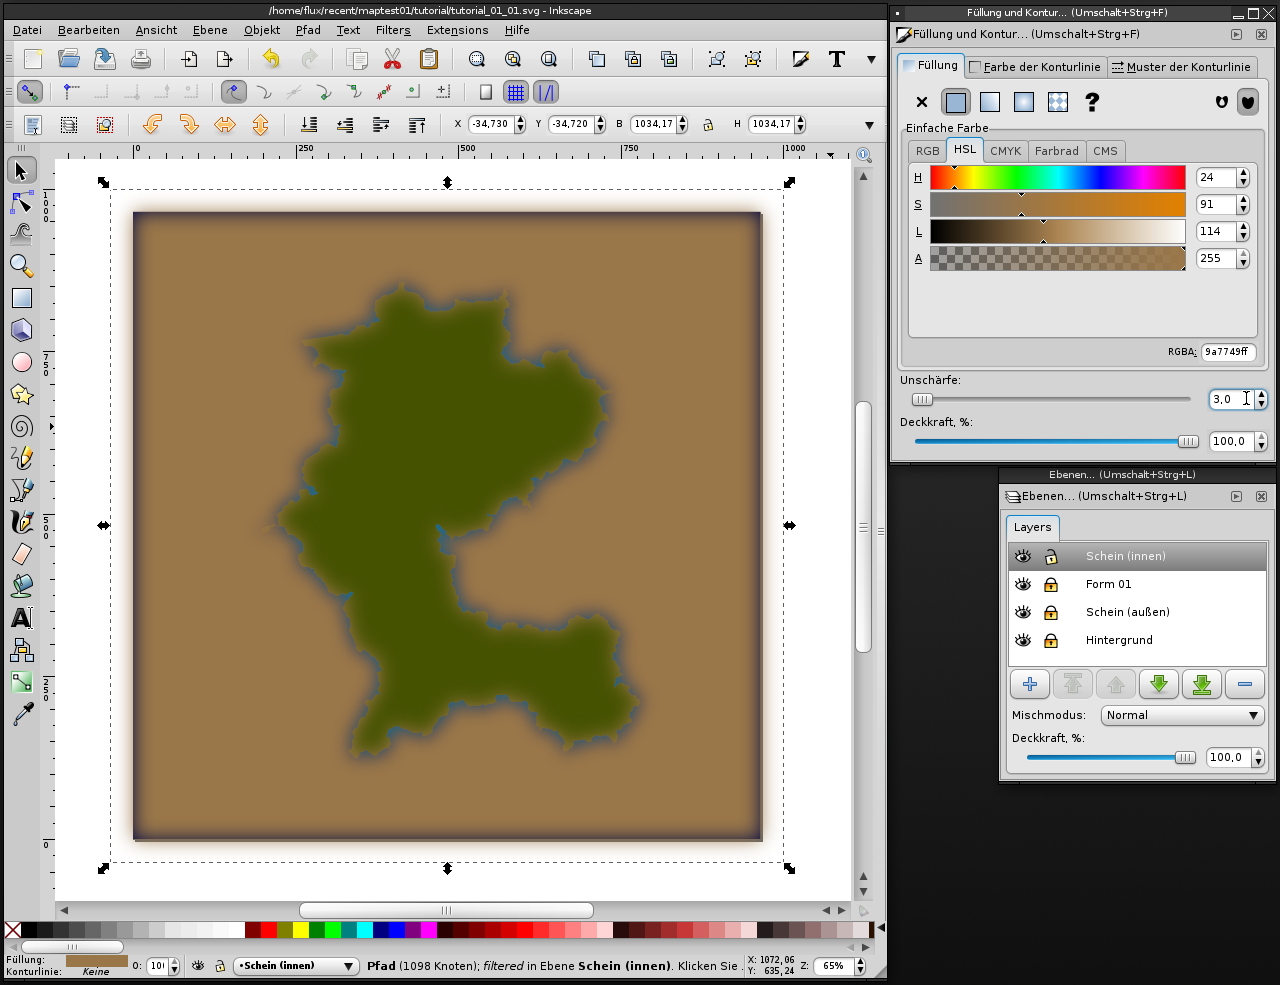
8) Select all objects on the layer "Glow (inner)", either by dragging a selection with the mouse (or pen), or by making sure that only this layer is unlocked (which should now be the case) and pressing Ctrl+A. Press Ctrl+- (minus on the key pad) to create a suitable shape for the next step. Choose a desaturated, middle dark orange as the color for the resulting shape (a "hole" in the background) and set the blur to roughly 3. Lock the layer "Glow (inner)".
9) Unlock the layer "Shape 01". Select the shape and copy it to the clipboard (Ctrl+C). Lock the layer "Shape 01" and unlock the layer "Glow (inner)". Select the layer "Glow (inner)" and paste the shape at the original position (Ctrl+Alt+V). Set the fill color of the copy to a pure white (ffffffff).
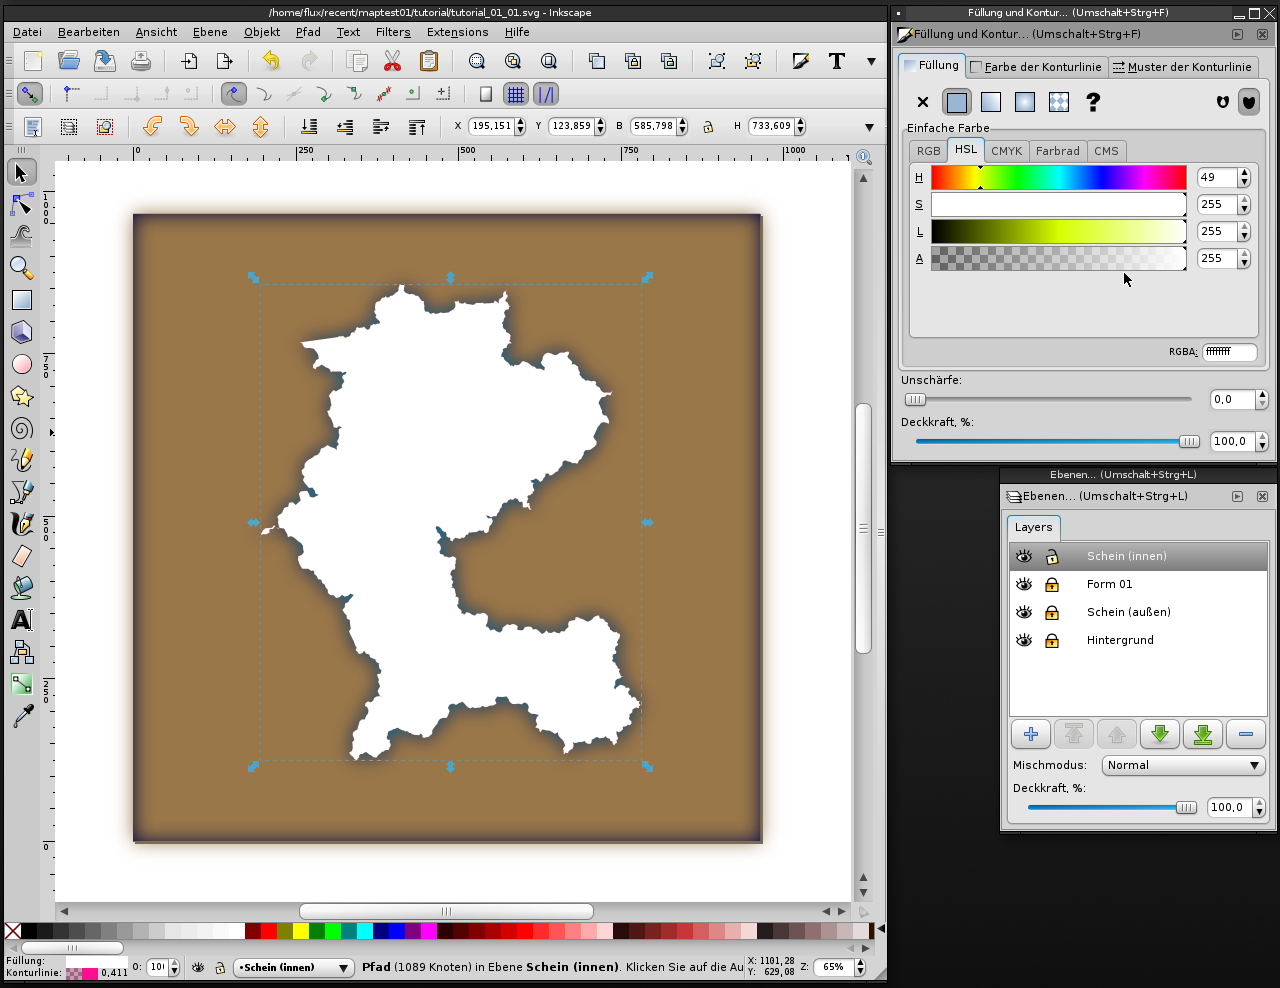
10) Select the white copy of the shape and the shape with the hole that has been previously created (if only the layer "Glow (inner)" is unlocked, it should suffice to press Ctrl+A). Select Object -> Mask -> Set from the menu.
This completes the inner glow! Now for the texture. There are certainly a lot of possibilities here, and it pays to try several textures and experiment a bit. In this tutorial I will not go beyond just the basics. It might also be a good idea to import the graphic into a different program that is better suited to working with textures (e.g. the GIMP) and continue there. Inkscape, however, does support some basic use of textures.
11) Create a new layer with the name "Texture". Lock all other layers. Select File -> Import from the menu and load the desired texture. This should be a grayscale image with an alpha channel. I use an image here that just has a black pattern and is otherwise transparent. Change the size and position so the texture overlaps the form.

12) Lock the layer "Texture" and unlock the layer "Shape 01". Select the shape and copy it to the clipboard (Strg+C). Lock the layer "Shape 01" and unlock the layer "Texture". Select the layer "Texture" and paste the shape at the original position (Ctrl+Alt+V). Set the color of the copy to white (ffffffff).
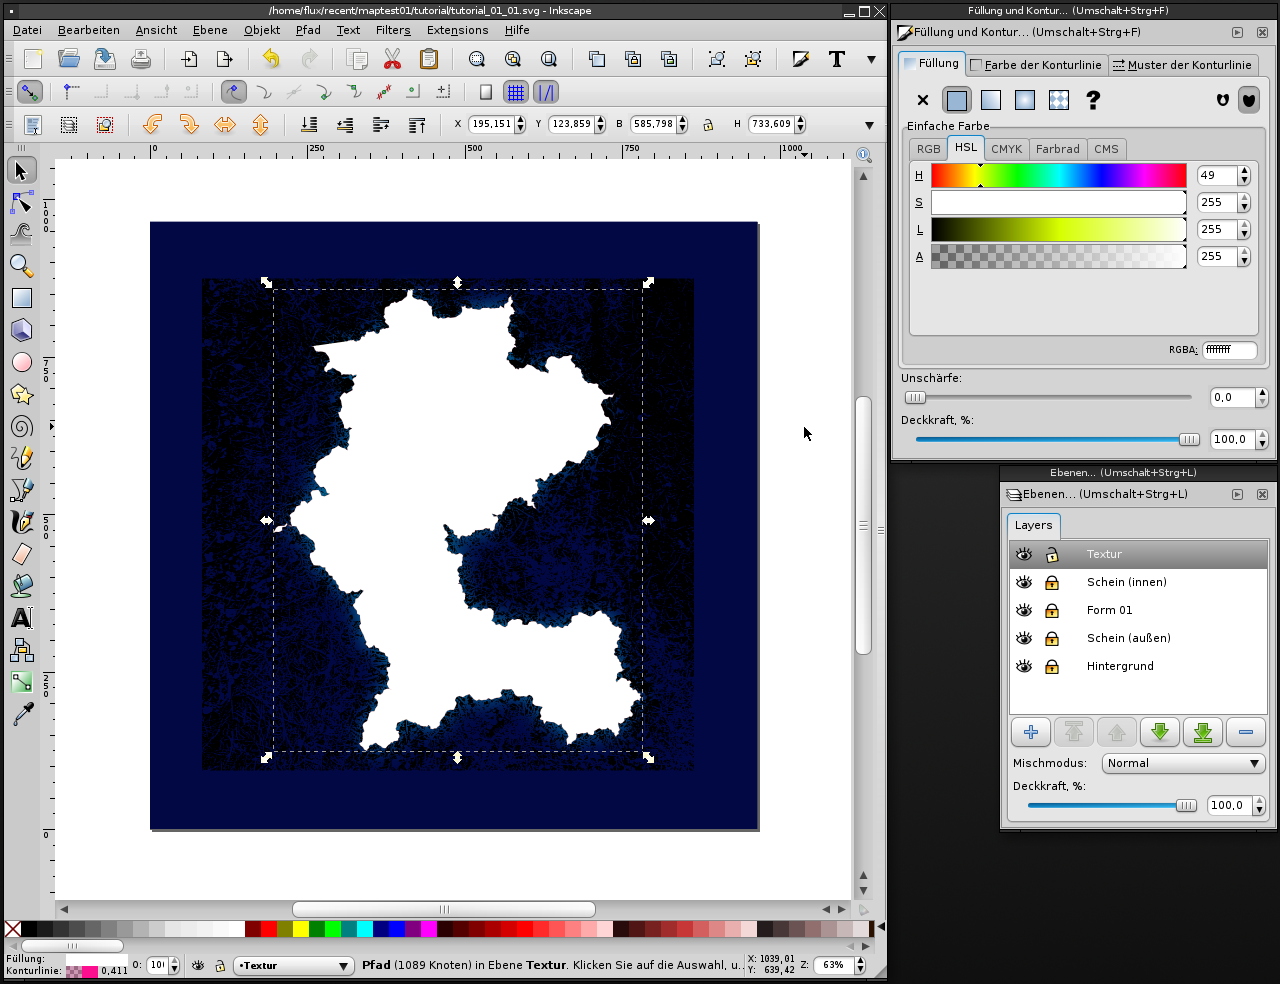
13) Select the texture image and the white copy of the shape. Select Object -> Mask -> Set. Set the layer opacity to a suitable value (fairly low, so the effect remains subtle and it will still be possible to add other textures).
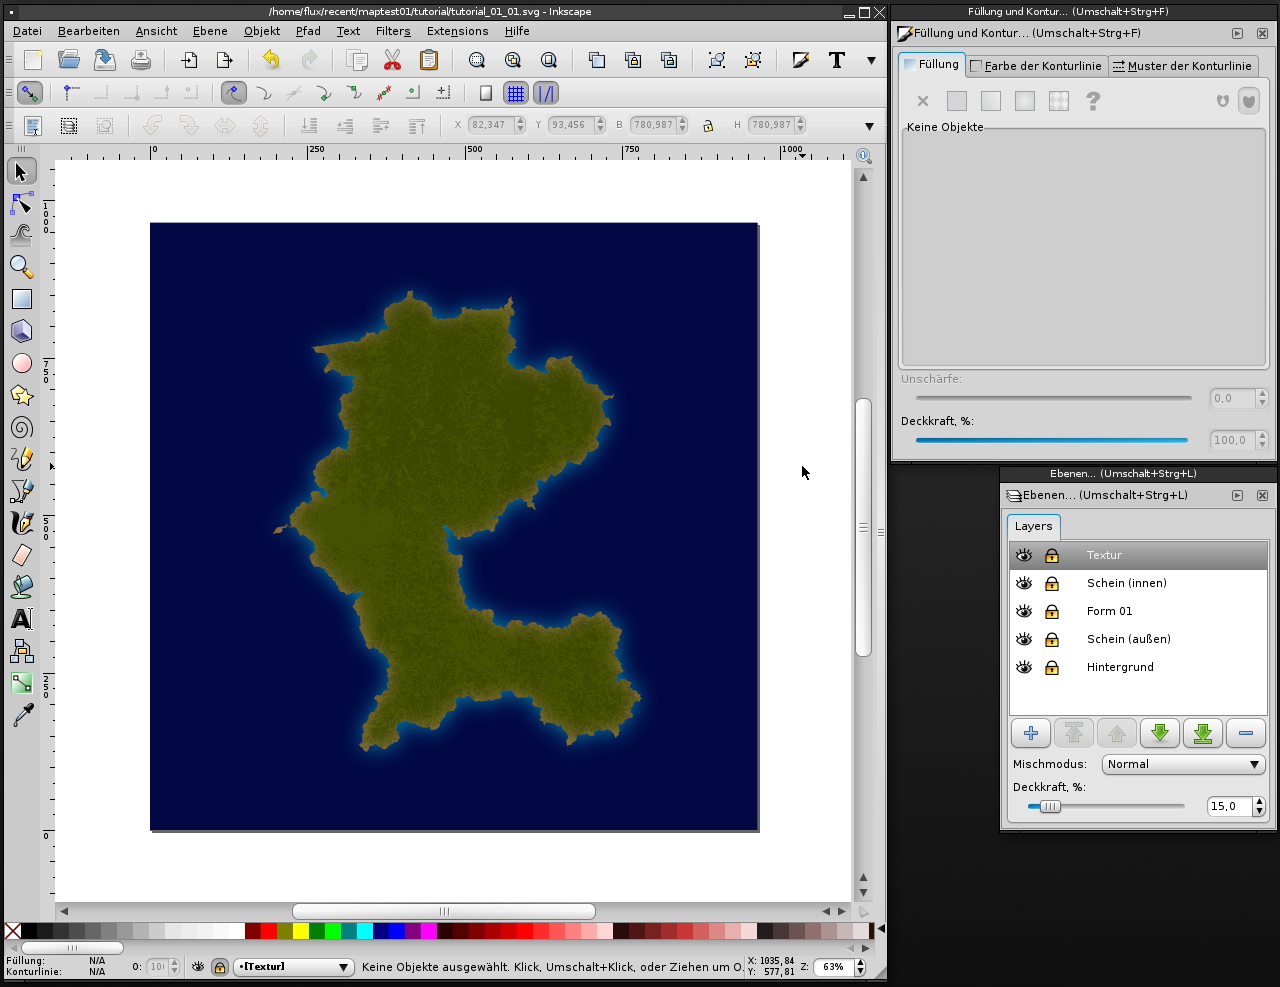
Now it is certainly possible to put some more work into the image to add detail, but for the purpose of this tutorial, it is done! :)